The Perfect Crunchy Bite for Every Occasion
Prep Time: 10 minutes Cook Time: 15 minutes Total Time: 25 minutes Cost per Serving: ~$0.50 Calories per Serving: ~120 kcal
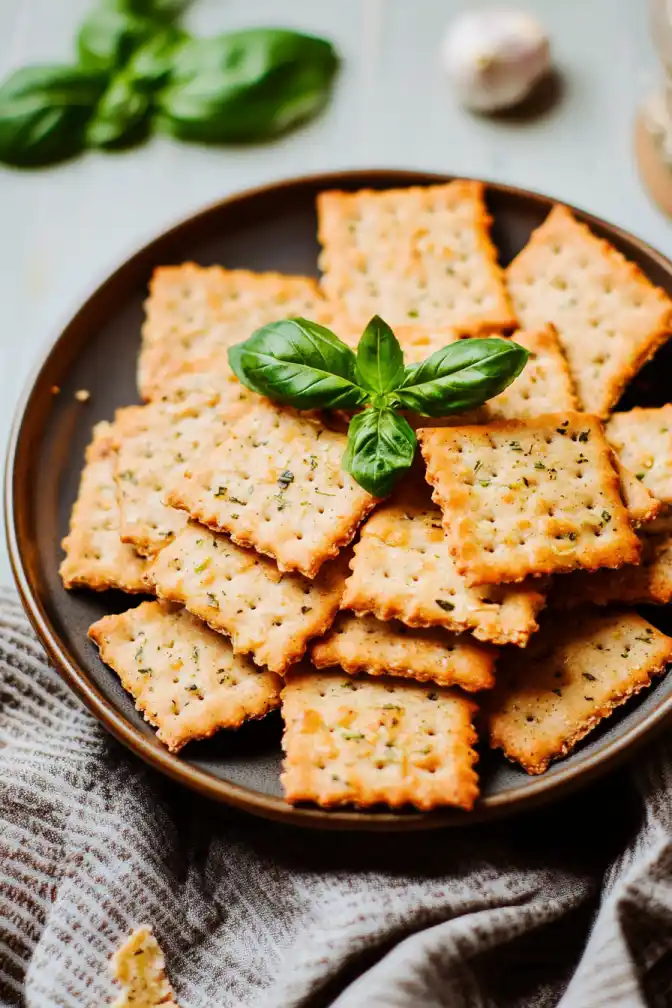
There’s something incredibly satisfying about homemade garlic herb crackers—the crisp texture, the burst of savory goodness, and that unmistakable aroma of freshly baked herbs. Whether you’re looking for a quick snack, an elegant addition to a charcuterie board, or a healthier alternative to store-bought options, these crackers check all the boxes. And the best part? They’re easy to make, gluten-free, and packed with flavor!
Why You’ll Love This Garlic Herb Crackers Recipe

Crispy and Crunchy – These crackers have the perfect snap—light but sturdy enough to hold up to dips, cheese, or just straight snacking. No flimsy, soft bites here.
Ridiculously easy – No fancy equipment, no complicated steps. Just mix, roll, cut, and bake. In under 30 minutes, you’ll have a batch of fresh, homemade crackers ready to go -Minimal prep, maximum crunch!
Keto and Low-Carb – With only 2g net carbs per serving, these crackers let you enjoy a satisfying crunch without breaking your macros.
Customizable – Swap the herbs, add a sprinkle of chili flakes for heat, or mix in some sesame seeds for extra texture. These crackers are a blank canvas for flavor.
Way Better Than Store-Bought – No preservatives, no weird ingredients—just pure, simple goodness. Plus, they taste fresher and have a much better crunch than anything from a box.
How to Make These Organic Crackers (Gluten-Free!)
Ingredients
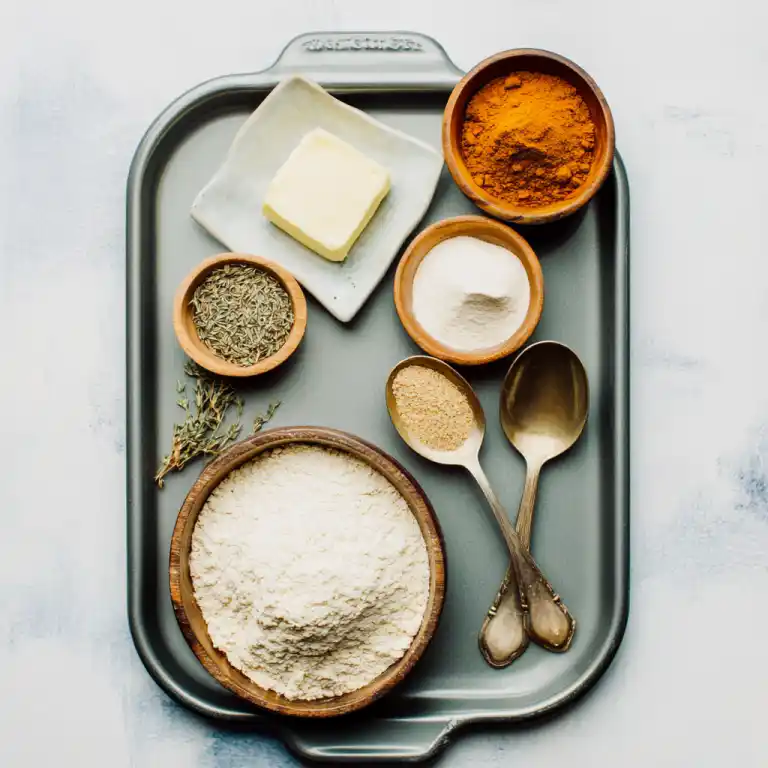
The exact measurements for each ingredient are listed in the recipe card below.

Almond Flour – This is the base of the crackers, giving them a light yet sturdy texture. Almond flour keeps things low-carb while adding a subtle nuttiness. If you only have almond meal, it’ll work too, but expect a slightly more rustic, grainy texture.
Parmesan Cheese – A little parmesan goes a long way in boosting flavor and crispiness. It also helps bind the dough together. If you prefer a milder taste, swap it for finely shredded mozzarella.
Ground Flaxseeds – These help absorb moisture and add just the right amount of structure. If you don’t have ground flaxseeds, you can use an extra tablespoon of almond flour, but the crackers may be a bit more delicate.
Garlic Powder – The key to that rich, savory depth. Fresh garlic won’t work here since it has too much moisture, but if you want an even stronger garlic punch, a little onion powder pairs well with it.
Dried Herbs – A blend of oregano, thyme, or rosemary gives these crackers an herby kick. Stick to one or mix them up for more complexity. If you have fresh herbs, chop them finely and double the amount.
Salt – A little salt enhances the flavors, making each bite extra satisfying. If using salted butter, consider reducing the amount slightly.
Egg – The binder that holds everything together. A flax egg (1 tbsp ground flax + 2.5 tbsp water) can work as a substitute, but the texture will be a bit more crumbly.
Melted Butter – Adds richness and crispiness. Coconut oil or olive oil can work in a pinch, but butter gives the best texture and flavor.
Step-by-Step Instructions
Prepare the Dough
Preheat your oven to 350°F (175°C). While it’s warming up, grab a mixing bowl and add the almond flour, parmesan, ground flaxseeds, garlic powder, dried herbs, and salt. Give it a quick stir to distribute everything evenly.
Crack the egg into a small bowl and whisk it lightly with a fork. Pour it into the dry ingredients, followed by the melted butter. Using a spatula or your hands, mix until the dough starts to come together. It should be soft but not too sticky—if it feels too wet, add a little more almond flour.
Roll and Cut the Crackers
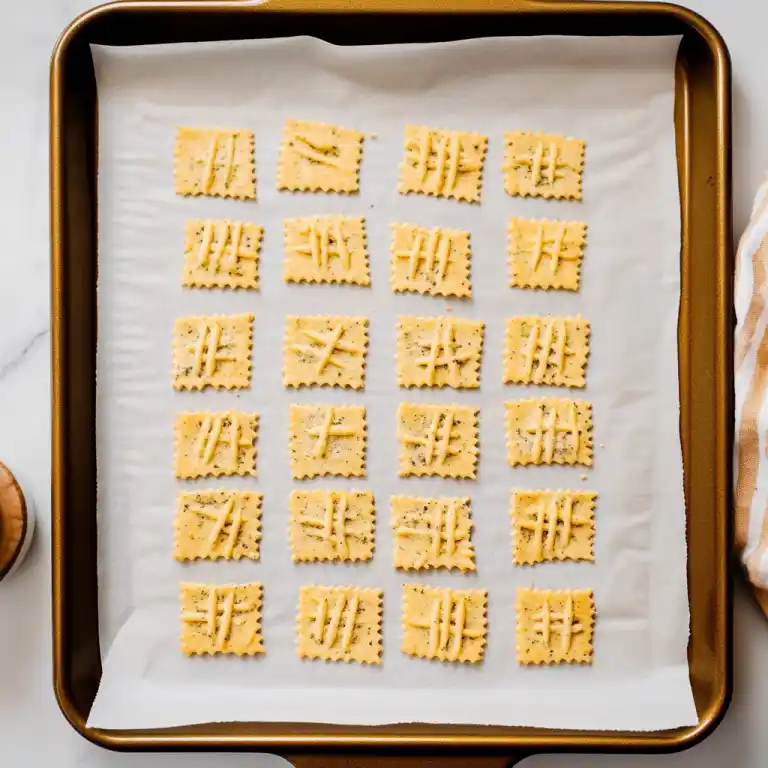
Tear off a large sheet of parchment paper and place the dough in the center. Cover it with another sheet of parchment, then use a rolling pin to flatten it to about 2-3 mm thick. The thinner the dough, the crispier the crackers will be.
Peel back the top layer of parchment and grab a sharp knife or pizza cutter. Slice the dough into small squares, rectangles, or whatever shape suits your mood. If you like a uniform look, a ruler makes a great guide—but rustic edges have their charm too.
Bake Until Golden and Crisp
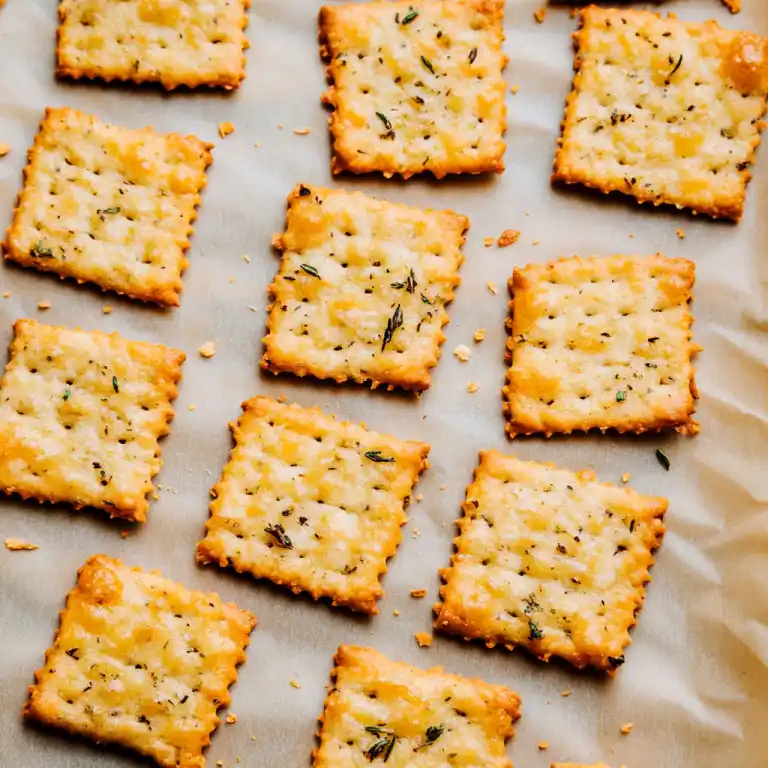
Transfer the parchment with the cut dough onto a baking sheet. Space the crackers slightly apart to ensure even baking. Slide the tray into the oven and bake for 12-15 minutes, or until the crackers turn golden brown around the edges.
For extra crunch, turn off the oven and let the crackers sit inside for another 5 minutes with the door slightly ajar.
Cool and Enjoy
Remove the tray from the oven and let the crackers cool completely before handling. They’ll crisp up as they cool, so be patient. Once they’re ready, serve them with your favorite dip, cheese, or just enjoy them as is. Store any extras in an airtight container for up to five days—but don’t be surprised if they disappear sooner.


Homemade Garlic Herb Crackers Tips
Make Sure the Dough Isn’t Too Wet or Too Dry
The dough should hold together easily without being sticky. If it’s too wet, sprinkle in a little more almond flour. If it’s too dry and crumbly, add a few drops of water or an extra teaspoon of melted butter to bring it back to the right consistency.
Roll the Dough Evenly for Perfect Crispiness
Thinner crackers bake up extra crispy, while thicker ones will be a little more tender. Aim for about 2-3 mm thick. If some areas are thicker than others, they won’t bake evenly, so take a moment to roll everything out as evenly as possible.
Use a Pizza Cutter for Quick, Even Slices
A knife works fine, but a pizza cutter makes slicing the dough into crackers so much easier. If you want extra clean edges, wipe the blade between cuts to prevent sticking.
Don’t Underbake—They Crisp Up as They Cool
These crackers might not feel fully crisp when you first take them out of the oven, but don’t worry. They firm up as they cool. If you like an extra crunchy bite, leave them in the oven (turned off) for another 5 minutes with the door slightly open.
Store Properly to Keep Them Fresh
Once completely cooled, store your crackers in an airtight container at room temperature. If they lose their crunch after a few days, just pop them back in the oven at 300°F for a few minutes to crisp them up again.
Perfect Pairings
Cheese Boards & Charcuterie
These crackers shine on a cheese board. Pair them with creamy brie, sharp cheddar, or a tangy goat cheese. Add some prosciutto or salami, and you’ve got a simple yet impressive snack platter.
Dips & Spreads
The crisp texture makes these perfect for scooping up your favorite dips. Try them with guacamole, hummus, or a classic spinach-artichoke dip. For a keto-friendly option, pair them with a whipped feta or smoked salmon spread.
Soups & Salads
Skip the croutons and serve these crackers alongside a bowl of tomato soup or a fresh Caesar salad. They add just the right amount of crunch without the carbs.
A Simple Snack
They’re so good on their own that you don’t even need a dip. Keep a batch on hand for an easy, satisfying snack whenever hunger strikes.
Here are some great ideas:
- Bruschetta Dip – Skip the bread and scoop up this flavorful, garlicky tomato dip with your homemade crackers. It’s a fresh and vibrant appetizer! Try the recipe here.
- Creamy Broccoli Cheddar Soup – Looking for a cozy meal? These crispy crackers are the perfect low-carb alternative to croutons in this rich, cheesy soup. Get the recipe here.
- Watermelon Salad with Balsamic Glaze – The salty crunch of these crackers contrasts beautifully with the sweet, juicy flavors of this refreshing summer salad. Check out the recipe here.
No matter how you serve them, these crackers will take your snacking to the next level!
When to Use These Crackers
As a Low-Carb Bread Alternative
If you’re cutting back on carbs but still want something crunchy to enjoy with cheese or spreads, these crackers are a great swap for bread or chips.
For Meal Prep & On-the-Go Snacking
They store well and stay crispy for days, making them perfect for packing in lunchboxes or keeping at your desk for a quick snack.
For Entertaining & Appetizers
Homemade crackers always impress guests. Serve them with a variety of dips and cheeses at your next gathering, and watch them disappear.
To Elevate Everyday Meals
A handful of these crackers can turn a simple soup or salad into a more satisfying meal. They add texture, flavor, and just the right amount of indulgence.
Kitchen Tools You’ll Need
- Rolling Pin – Helps flatten the dough evenly for perfectly crisp crackers. If you don’t have one, a wine bottle works in a pinch! Find it on Amazon
- Pizza Cutter or Sharp Knife – Makes slicing the dough into uniform crackers quick and easy. A ruler can help if you want perfectly even squares. Find it on Amazon
FAQ
Can I store these crackers for later?
Yes! Once they’re completely cool, store them in an airtight container at room temperature for up to five days. If they start to lose their crispness, pop them in a 300°F oven for a few minutes to refresh them.
Can I freeze them?
Absolutely. Let them cool completely, then store them in a freezer-safe container for up to a month. To enjoy, reheat them in a low oven for a few minutes until crisp again.
Can I make these dairy-free?
Yes! Swap the parmesan for nutritional yeast to keep the cheesy flavor while making the recipe completely dairy-free. You can also use a dairy-free shredded cheese alternative.
Can I use coconut flour instead of almond flour?
Not in this recipe. Coconut flour absorbs a lot more liquid and would make the dough too dry and crumbly. Stick with almond flour for the best texture.
How do I make them extra crispy?
Roll the dough as thin as possible—around 2 mm is ideal. Let the crackers bake until golden brown, then turn off the oven and leave them inside with the door slightly open for another 5 minutes. This helps them crisp up even more.
Can I add different flavors?
Definitely! Try smoked paprika for a little heat, sesame seeds for extra crunch, or even a sprinkle of Everything Bagel seasoning for a bold twist.
Print
Garlic Herb Crackers
- Total Time: 25 minutes
- Yield: About 40 crackers 1x
- Diet: Gluten Free
Description
These crispy, flavorful garlic herb crackers are the perfect low-carb alternative to store-bought snacks. Made with almond flour, parmesan, and a blend of herbs, they deliver the perfect crunch with every bite. Great on their own, with cheese, or paired with dips, they’re an easy, gluten-free option ready in under 30 minutes!
Ingredients
1 ½ cups almond flour
2 tbsp ground flaxseed (for a nutritious boost)
½ tsp salt
1 tsp garlic powder
1 tbsp dried Italian herbs (or a mix of basil, oregano, and thyme)
¼ tsp black pepper
2 tbsp olive oil
2 tbsp water
1 tbsp sesame seeds (optional, for extra texture)
Instructions
In a large mixing bowl, whisk together the almond flour, flaxseed, salt, garlic powder, dried herbs, and black pepper. This ensures an even distribution of flavors in every bite.
Pour in the olive oil and water, then mix until a dough forms. If the dough feels too dry, add a teaspoon of water at a time until it holds together.
Place the dough between two sheets of parchment paper and roll it out to about ⅛ inch thickness. Remove the top parchment and use a sharp knife or pizza cutter to slice into cracker-sized squares. Want to get fancy? Use a cookie cutter for fun shapes!
Transfer the parchment with the crackers onto a baking sheet and bake at 325°F (163°C) for 12-15 minutes, or until golden brown. Keep an eye on them—they can go from perfectly crisp to overdone in seconds!
Let the crackers cool completely before breaking them apart. They’ll crisp up even more as they cool!
Notes
- For extra crispy crackers: Roll the dough thinner and bake a little longer.
- Dairy-free version: Replace parmesan with nutritional yeast.
- Add a kick: Sprinkle in some red pepper flakes or smoked paprika.
- To refresh stale crackers: Reheat in a 300°F oven for a few minutes.
- Prep Time: 10 minutes
- Cook Time: 15 minutes
- Category: Table Toppers
- Method: Baking
- Cuisine: Keto, Gluten-Free
Nutrition
- Serving Size: 5 crackers
- Calories: 120kcal
- Sodium: 150mg
- Fat: 10g
- Saturated Fat: 3g
- Unsaturated Fat: 7g
- Carbohydrates: 3g
- Fiber: 1g
- Protein: 5g
- Cholesterol: 25mg
Keywords: keto crackers, gluten-free crackers, garlic herb crackers, almond flour crackers, homemade crackers, healthy snacks, keto snack ideas
Let’s Get Baking!
These garlic herb crackers are the perfect balance of flavor, crunch, and wholesomeness. Whether you’re enjoying them as a midday snack or pairing them with your favorite dips, they’re sure to become a household favorite. Try them out, and don’t forget to share your results!

