- Prep Time: 15 minutes
- Cooking Time: 10 minutes
- Total Time: 25 minutes
- Cost per Serving: $1.20
- Calorie Count per Serving: 90 calories
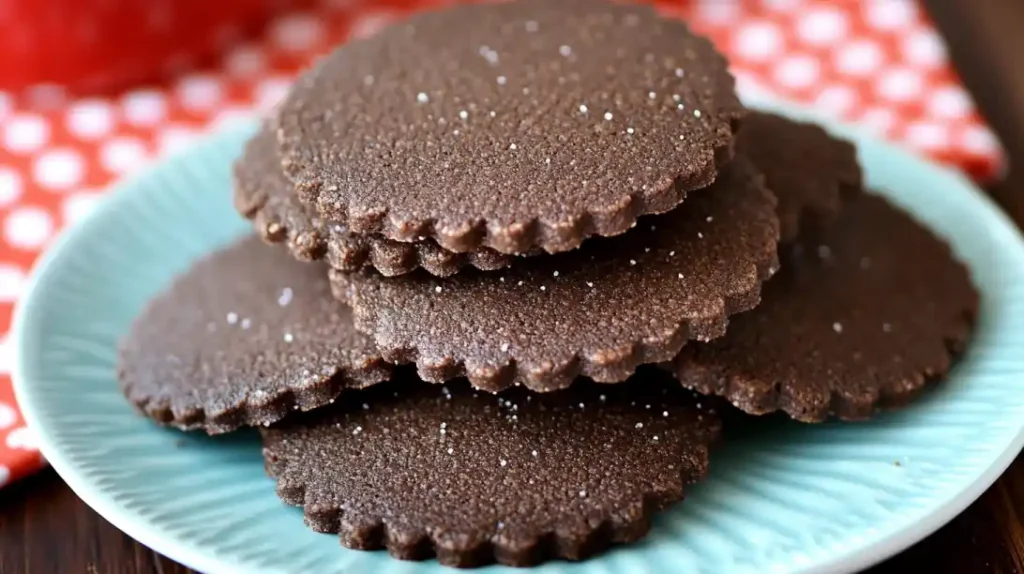
Who doesn’t love the crunch and sweetness of chocolate wafer cookies? These low-carb chocolate wafer cookies are perfect for satisfying your sweet tooth without sabotaging your healthy lifestyle. Light, crispy, and with a rich chocolate flavor, they’re a versatile treat you can enjoy plain or use as a base for other desserts like ice cream sandwiches.
Let’s dive in to make these quick, easy, and keto-friendly chocolate wafers.
WHY YOU’LL LOVE THIS RECIPE

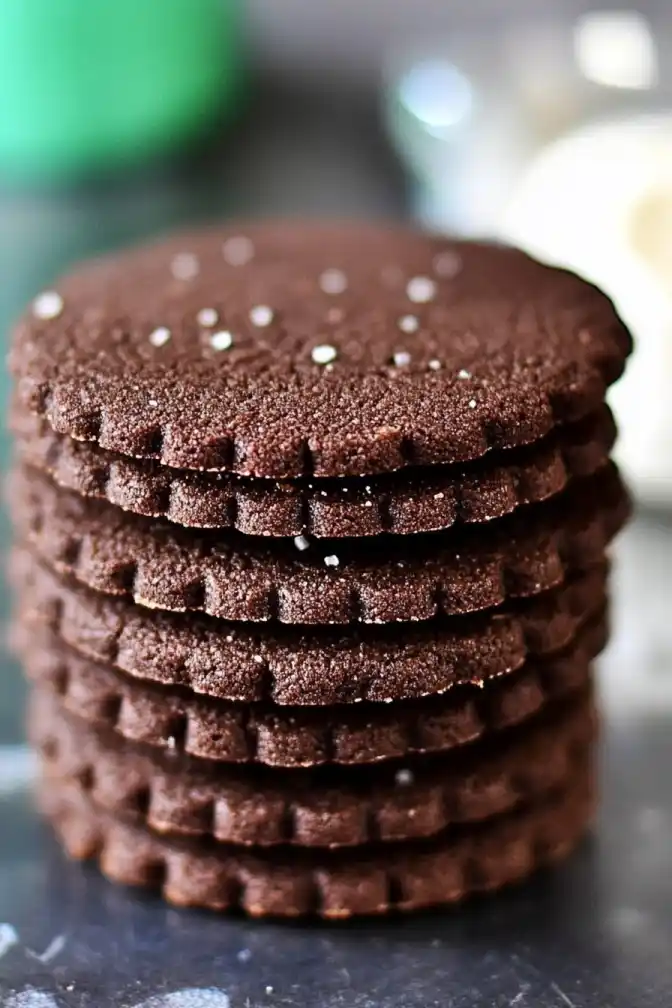
Crispy, crunchy, and full of chocolate flavor. These wafers have that perfect light snap when you bite into them, with a deep cocoa taste that’s not too sweet but totally satisfying. If you love the crispy texture of classic chocolate wafers, you’ll love these even more.
Low-carb, sugar-free, and guilt-free. Traditional chocolate wafer cookies are packed with sugar and refined flour, but these are completely keto-friendly, gluten-free, and grain-free—with just 2g net carbs per cookie.
Perfect for layering, dipping, or snacking. Stack them into a keto icebox cake, crush them into a cookie crust, or just enjoy them with a cup of coffee. They’re as versatile as they are delicious.
So easy to make. No complicated steps, no fancy equipment—just mix, roll, and bake. Plus, they crisp up beautifully as they cool, so you don’t have to wait long to enjoy them.
Tastes even better than store-bought. These have that classic wafer crunch but with a richer, more intense chocolate flavor. Once you try them, you’ll never want the processed version again!
INGREDIENTS
The exact ingredient measurements can be found below in the recipe card.
Almond Flour: The base of these cookies. It keeps them light and crispy while adding a slightly nutty flavor. Use blanched almond flour for a smoother texture. If you only have almond meal, the cookies will still work, but they’ll be a bit more rustic.
Coconut Flour: A little goes a long way! This flour helps absorb moisture, ensuring the cookies hold their shape while staying perfectly crisp. If you don’t have coconut flour, you can replace it with a bit more almond flour, but the texture may be slightly different.
Unsweetened Cocoa Powder: The key to that deep, chocolatey flavor. Go for a Dutch-processed cocoa powder if you want a more intense, smooth chocolate taste. Regular cocoa powder works too, but it will give a slightly tangier bite.
Baking Soda: Just a tiny bit is enough to give these cookies the right texture—light and crispy, but still rich.
Salt: A pinch of salt enhances the chocolate flavor and balances the sweetness. If you love a salty-sweet contrast, you can even sprinkle a little flaky sea salt on top before baking.
Powdered Sweetener: Erythritol, monk fruit, or allulose work best here. Powdered sweeteners dissolve more evenly, giving the cookies a smooth texture. Granulated sweeteners might make them a little grainy, so avoid those if possible.
Instant Espresso Powder (Optional): Don’t worry, these cookies won’t taste like coffee! A little espresso powder simply enhances the chocolate flavor, making it deeper and richer. If you don’t have any, you can skip it—but if you love an intense chocolate taste, it’s worth adding.
Butter: Softened butter adds richness and helps create that crisp yet tender bite. If you’re dairy-free, coconut oil makes a good substitute, though the flavor will be slightly different.
Egg: One room-temperature egg binds everything together and gives the cookies their structure. If your egg is cold, let it sit in warm water for a few minutes before using.
Vanilla Extract: A little vanilla goes a long way in rounding out the chocolate flavor. If you have vanilla bean paste, even better!
Unsweetened Almond Milk: Just enough to help bring the dough together without making it too wet. If you don’t have almond milk, any unsweetened non-dairy milk will work.
STEP-BY-STEP INSTRUCTIONS

Preheat your oven to 350°F (175°C). While it heats up, line a baking sheet with parchment paper. This keeps the cookies from sticking and makes cleanup effortless.
Whisk the dry ingredients. In a medium bowl, combine almond flour, coconut flour, cocoa powder, baking soda, salt, and espresso powder. Whisk well to break up any clumps. If you’re skipping the espresso powder, no worries—the cookies will still be rich and chocolaty.
Cream the butter and sweetener. In a large mixing bowl, beat softened butter and powdered sweetener until light and fluffy. Add the egg, vanilla extract, and almond milk, and mix until smooth.
Bring it all together. Gradually add the dry ingredients to the wet, stirring until a dough forms. If it feels a little sticky, don’t panic—just pop it in the fridge for 15 minutes to firm up.
Roll and cut. Place the dough between two sheets of parchment paper and roll it out to about ⅛-inch thick—the thinner, the crispier. Use a 2-inch round cookie cutter to cut out wafers, then carefully transfer them to the baking sheet. If you don’t have a cookie cutter, a small glass or lid works just fine.
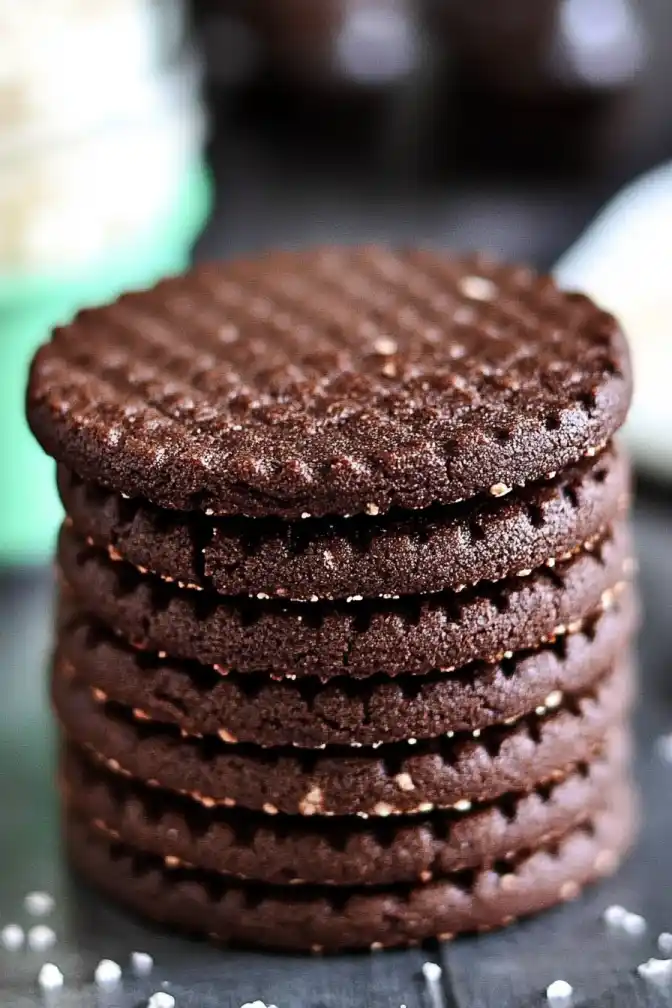
Poke holes and bake. To prevent bubbling, use a fork to gently poke a few holes in each cookie. Bake for 8–10 minutes, or until the edges look set. Don’t worry if they still feel soft—they’ll crisp up as they cool.
Cool completely. The magic happens once they’re out of the oven. Let the cookies sit on the baking sheet for 5 minutes, then transfer them to a wire rack to cool completely. The longer they sit, the crunchier they get.
Now the hard part: resisting the urge to eat them all at once!
TIPS FOR PERFECT CHOCOLATE WAFER COOKIES
Roll the dough thin. The secret to that classic crispy wafer texture? Roll the dough out to ⅛ inch thick—any thicker, and they’ll be more like soft cookies. If you want super crunchy cookies, go even thinner.
Chill the dough if it’s too soft. If the dough feels sticky or hard to handle, pop it in the fridge for 15 minutes. This makes it way easier to roll and cut without sticking to everything.
Don’t skip the fork pokes. Those tiny holes aren’t just for looks—they help prevent bubbling and keep the cookies evenly crisp.
Let them cool completely. These cookies will firm up as they cool, so don’t judge their crunchiness straight out of the oven. Give them at least 10–15 minutes to reach peak crispness.
Want them extra crispy? After baking, turn off the oven and leave the cookies inside with the door slightly open for another 5–10 minutes. This helps them dry out even more without overbaking.
Store them right. Keep them in an airtight container at room temperature for up to 5 days. If they lose their crunch, just pop them in a 300°F oven for a few minutes to refresh them.
Follow these tips, and you’ll have perfectly crispy, chocolatey wafers every time!
PERFECT PAIRINGS & WHEN TO SERVE
Pair with the perfect drink. These chocolate wafers are made for dunking! Try them with a hot cup of coffee, a steaming mug of sugar-free hot chocolate, or a cold glass of almond milk for that ultimate crispy-meets-creamy experience.

Try pairing your chocolate wafer cookies with:
- Cinnamon Toast Crunch Shot: sweet and spicy flavors of the shot perfectly complement the deep cocoa notes of the cookies.
- Collagen Coffee Recipe.: protein-packed, The creamy coffee enhances the flavors of the cookies and adds a satisfying energy boost to your day.
- Homemade Pumpkin Spice Latte. The warm spices and creamy texture are a delightful contrast to the crisp cookies.
Use them in desserts. Craving something extra special? Layer them into a keto icebox cake, crumble them over low-carb vanilla ice cream, or sandwich them with sugar-free whipped cream for a decadent treat. You can even dip them in melted sugar-free chocolate for a double chocolate crunch.
Great for any occasion. Whether you need a light afternoon snack, a sweet treat after dinner, or a homemade gift, these wafers fit the bill. Make a big batch, store them in an airtight container, and you’ll always have something delicious on hand.
No matter how you enjoy them, these chocolate wafer cookies are crisp, chocolaty, and impossible to resist!
FAQ: All Your Questions Answered
Here’s everything you need to know to make these chocolate wafer cookies perfectly every time.
1. Can I Freeze These Cookies?
Yes, these chocolate wafer cookies freeze beautifully! Store them in an airtight container or zip-top bag for up to 3 months. When you’re ready to enjoy them, let them thaw at room temperature for about 15 minutes. They’ll taste just as crispy and delicious as freshly baked!
2. Can I Make These Without Sweetener?
Yes, but keep in mind that removing the sweetener will result in a more bittersweet flavor. If you enjoy a pure chocolate taste, go for it! For a natural sweetness boost, you can also add a few drops of liquid stevia or monk fruit extract.
3. Are These Cookies Suitable for Diabetics?
Absolutely! These chocolate wafer cookies are made with keto-friendly ingredients like almond flour, erythritol, and unsweetened cocoa powder, which are low on the glycemic index. However, always consult your healthcare provider to ensure they align with your dietary needs.
4. How Do I Keep the Cookies Crisp?
To maintain their crispiness:
- Store them in an airtight container at room temperature.
- If you live in a humid environment, place a small piece of parchment paper or a food-safe silica packet inside the container to absorb excess moisture.
5. Can I Use a Different Flour?
Yes! While almond flour is ideal for this chocolate wafer cookies, you can experiment with:
- Coconut Flour: Use less (about ⅓ cup) and add more liquid to the dough.
- Sunflower Seed Flour: A great nut-free alternative that works as a 1:1 substitute.
- Oat Fiber: Adds a slightly drier texture, but still works for low-carb baking.
6. Can I Make the Dough Ahead of Time?
Absolutely! Prepare the dough and store it in the fridge for up to 24 hours before baking. Just let it sit at room temperature for a few minutes to soften slightly before rolling it out.
7. My Dough is Too Sticky—What Should I Do?
If your dough feels sticky, try these fixes:
- Chill the dough in the fridge for 15-20 minutes to firm it up.
- Sprinkle a bit of almond flour on your work surface or parchment paper to prevent sticking.
8. Can I Double the Recipe?
Yes, this recipe is perfect for scaling up! Simply double the ingredient amounts and bake in batches as needed. Make sure not to overcrowd the baking sheet so the cookies bake evenly.
9. What Sweetener Works Best for These Cookies?
Erythritol is an excellent choice because it’s keto-friendly and doesn’t leave an aftertaste. Other great options include:
- Monk Fruit Sweetener: Provides a slightly mellower sweetness.
- Allulose: For a soft sweetness, though it may result in slightly chewier cookies.
10. Can I Add Fillings or Toppings?
Definitely! These cookies are a blank canvas for creativity. Some ideas include:
- Filling them with sugar-free frosting or keto chocolate ganache for sandwich cookies.
- Drizzling with melted sugar-free chocolate.
- Topping with crushed nuts, coconut flakes, or sea salt for added texture.
11. How Many Carbs are in Each Cookie?
Each cookie has approximately 4g total carbs, with 2g net carbs after accounting for fiber. This makes them a great low-carb snack!
12. Can I Use These Cookies for Other Desserts?
Absolutely! These versatile cookies work well as:
- A crust for cheesecakes or pies (crushed and mixed with butter).
- Layers in keto-friendly trifles or parfaits.
- Decorations for cakes and cupcakes.
Have more questions? Leave them in the comments section below, and we’ll be happy to help! This FAQ ensures you’ll bake with confidence and create the perfect chocolate wafer cookies every time.
Recommended Products
Please note that the links below are affiliate links. If you click and make a purchase, I’ll earn a small commission (at no additional cost to you). Thank you for supporting my blog!
To make these chocolate wafer cookies truly perfect, we recommend using high-quality, keto-friendly ingredients and tools. Here’s a list of our favorite products to help you bake with confidence:
1. Almond Flour : Blanched Almond Flour – Superfine
This finely milled almond flour ensures a smooth dough and perfect texture for your cookies.
2. Unsweetened Cocoa Powder : Dutch-Processed Unsweetened Cocoa Powder
For a deep, rich chocolate flavor, this cocoa powder is a must-have. It’s low in carbs and enhances the chocolatey goodness of your cookies.
3. Keto-Friendly Sweetener :Erythritol Sweetener – Granular or Powdered
A versatile and non-bitter sweetener that blends seamlessly into the dough.
Print
Chocolate Wafer Cookies
- Total Time: 25 minutes
- Yield: 20 cookies 1x
- Diet: Gluten Free
Description
These crispy, chocolaty wafer cookies have the perfect crunch with a deep cocoa flavor—all without the sugar! Made with almond flour, coconut flour, and cocoa powder, they’re completely low-carb, gluten-free, and keto-friendly. Perfect for snacking, layering into desserts, or dunking in your favorite drink!
Ingredients
For the Chocolate Wafer Cookies:
1 cup almond flour
¼ cup coconut flour
¼ cup unsweetened cocoa powder
½ tsp baking soda
¼ tsp salt
⅓ cup powdered erythritol (or preferred keto sweetener)
½ tsp instant espresso powder (optional, enhances chocolate flavor)
¼ cup butter, softened
1 egg
1 tsp vanilla extract
2 tbsp unsweetened almond milk
Instructions
1-Preheat and prep: Preheat oven to 350°F (175°C). Line a baking sheet with parchment paper.
2-Mix the dry ingredients: In a medium bowl, whisk together almond flour, coconut flour, cocoa powder, baking soda, salt, and espresso powder until evenly combined.
3-Cream the butter and sweetener: In a separate bowl, beat butter and powdered sweetener until light and fluffy. Add egg, vanilla extract, and almond milk, and mix until smooth.
4-Combine the wet and dry ingredients: Gradually add the dry mixture to the wet mixture, stirring until a dough forms. If it feels too sticky, refrigerate for 15 minutes to firm up.
5-Roll and cut the cookies: Place the dough between two sheets of parchment paper and roll it out to ⅛-inch thickness. Use a 2-inch round cookie cutter to cut out wafers. Transfer to the baking sheet, spacing them about ½ inch apart.
6-Poke and bake: Use a fork to gently poke a few holes in each cookie to prevent bubbling. Bake for 8–10 minutes, or until the edges are set.
7-Cool completely: Let the cookies cool on the baking sheet for 5 minutes, then transfer them to a wire rack to crisp up fully.
Enjoy as is, or use them in your favorite keto desserts!
Notes
- Storage: Keep cookies in an airtight container at room temperature for up to 5 days. Refrigerate for up to 2 weeks or freeze for up to 3 months.
- For extra crispiness: After baking, turn off the oven and let the cookies sit inside with the door slightly open for 5–10 minutes.
- Want to make sandwich cookies? Spread sugar-free frosting, peanut butter, or keto-friendly ganache between two wafers for an extra indulgent treat!
- Prep Time: 15 minutes
- Cook Time: 10 minutes
- Category: Sweet tooth
- Method: Baking
- Cuisine: American
Nutrition
- Serving Size: 1 cookie
- Calories: 90 kcal
- Sodium: 60 mg
- Fat: 8g
- Saturated Fat: 3g
- Unsaturated Fat: 5g
- Carbohydrates: 4g
- Fiber: 2g
- Protein: 3g
- Cholesterol: 15mg
Keywords: low-carb chocolate wafer cookies, keto chocolate cookies, sugar-free chocolate wafers, gluten-free wafer cookies, crispy chocolate cookies, homemade chocolate wafers
Final Thoughts
Crispy, chocolatey, and keto-friendly—what more could you ask for? Try these chocolate wafer cookies and let us know how they turned out in the comments below. Don’t forget to share this recipe with your fellow low-carb enthusiasts!


👍❤️